Istio AuthorizationPolicy automation
Otterize automates mTLS-based, HTTP-level pod-to-pod access control with Istio authorization (authZ) policies, within your Kubernetes cluster.
Implementing this kind of access control with Istio is complicated. For example, authorization policies select servers by label, and clients by service account, so both of those need to be created or updated.
To help you avoid manually managing complicated authorization policies per server, Otterize implements intent-based access control (IBAC). You just declare what calls the client pods intend to make, and everything is automatically wired together so only intended calls are allowed.
In this tutorial, we will:
- Deploy an Istio demo application with two client pods and one server pod.
- Declare that the first client intends to call the server with a specific HTTP path and method.
- See that an Istio authorization policy was autogenerated to allow just that, and to block the (undeclared) calls from the other client.
Prerequisites
Already have Otterize deployed with Istio configured on your cluster? Skip to the tutorial.
1. Deploy Otterize
If you do not have a cluster, we will need to prepare one with network policy support
To deploy Otterize, head over to Otterize Cloud and associate a Kubernetes cluster on the Integrations page, and follow the instructions. If you already have a Kubernetes cluster connected, skip this step. Make sure you set the enforcement.
2. Install and configure Istio
Install Istio in the cluster via Helm
helm repo add istio https://istio-release.storage.googleapis.com/charts
helm repo update
helm install istio-base istio/base -n istio-system --create-namespace
helm install istiod istio/istiod -n istio-system --wait
Add HTTP methods and request paths to Istio exported metrics
Apply this configuration in the istio-system namespace, propagating it to all namespaces covered by the mesh.
kubectl apply -f https://docs.otterize.com/code-examples/network-mapper/istio-telemetry-enablement.yaml -n istio-system
apiVersion: telemetry.istio.io/v1alpha1
kind: Telemetry
metadata:
  name: mesh-default
  namespace: istio-system
spec:
  accessLogging:
    - providers:
        - name: envoy
  metrics:
    - providers:
        - name: prometheus
      overrides:
        - tagOverrides:
            request_method:
              value: request.method
            request_path:
              value: request.path
HTTP request paths and methods aren't exported in Envoy's connection metrics by default, but we do want to capture those details when creating the network map. That way we not only have better visibility of the calling patterns, e.g. in the access graph, but we can also use that information to automatically generate fine-grained intents and enforce them with Istio authorization policies.
Tutorial
Deploy the two clients and the server
Deploy a simple example consisting of client and other-client calling nginx over HTTP:
kubectl apply -n otterize-tutorial-istio -f https://docs.otterize.com/code-examples/istio-authorization-policies/all.yaml
Apply intents
We will now declare that the client intends to call the server at a particular HTTP path using a specific HTTP method.
When the intents YAML is applied, creating a custom resource of type ClientIntents,
Otterize will add an Istio authorization policy to allow the intended call
(client → server with the declared path and method) and block all unintended calls (e.g., client-other → server).
You can click on the workloads or the lines connecting them to see which ClientIntents you need to apply to make the connection go green!
- Here is the
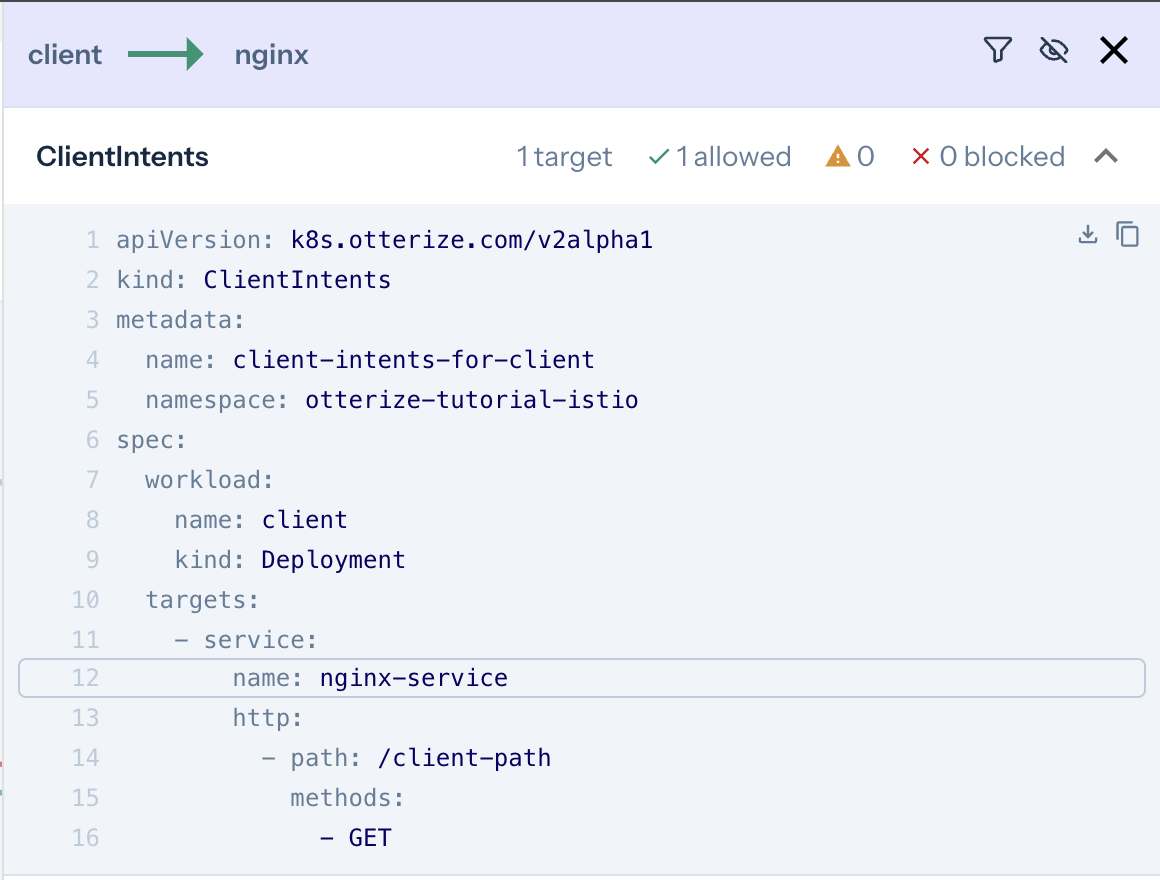
intents.yamldeclaration of the client, which we will apply below:
apiVersion: k8s.otterize.com/v2beta1
kind: ClientIntents
metadata:
  name: client
  namespace: otterize-tutorial-istio
spec:
  workload:
    name: client
    kind: Deployment
  targets:
    - service:
        name: nginx-service
        http:
          - path: /client-path
            methods: [ GET ]
To apply it, use:
kubectl apply -n otterize-tutorial-istio -f https://docs.otterize.com/code-examples/istio-authorization-policies/intents.yaml
See it in action
Optional: check deployment status
kubectl get pods -n otterize-tutorial-istio
You should see
NAME                           READY   STATUS    RESTARTS   AGE
client-68b775f766-749r4         2/2     Running   0          32s
nginx-c646898-2lq7l             2/2     Running   0          32s
other-client-74cc54f7b5-9rctd   2/2     Running   0          32s
Monitor both client attempts to call the server with additional terminal windows, so we can see the effects of our changes in real time.
- Open a new terminal window [client] and tail the client log:
kubectl logs -f --tail 1 -n otterize-tutorial-istio deploy/client
Expected output
At this point the client should be able to communicate with the server:
Calling server...
HTTP/1.1 200 OK
...
hello from /client-path
- Open another terminal window [client-other] and tail the other-client log:
kubectl logs -f --tail 1 -n otterize-tutorial-istio deploy/other-client
Expected output
At this point the client should be able to communicate with the server:
Calling server...
HTTP/1.1 200 OK
...
hello from /other-client-path
Keep an eye on the logs being tailed in the [other-client] terminal window,
and apply this intents.yaml file in your main terminal window using:
kubectl apply -f https://docs.otterize.com/code-examples/istio-authorization-policies/intents.yaml
Client intents are the cornerstone of intent-based access control (IBAC).
as expected since it didn't declare its intents:
Calling server...
HTTP/1.1 200 OK
...
hello from /other-client-path  # <- before applying the intents file
Calling server...              # <- after applying the intents file
curl timed out
Terminated
- And in the [client] terminal you should see that calls go through, as expected since they were declared:
Calling server...
HTTP/1.1 200 OK
...
hello from /client-path
- You should also see that a new Istio authorization policy was created:
kubectl get authorizationpolicies.security.istio.io -n otterize-tutorial-istio
This should return:
NAME                                                                AGE
authorization-policy-to-nginx-from-client.otterize-tutorial-istio   6s
Go back to see the access graph in your browser:
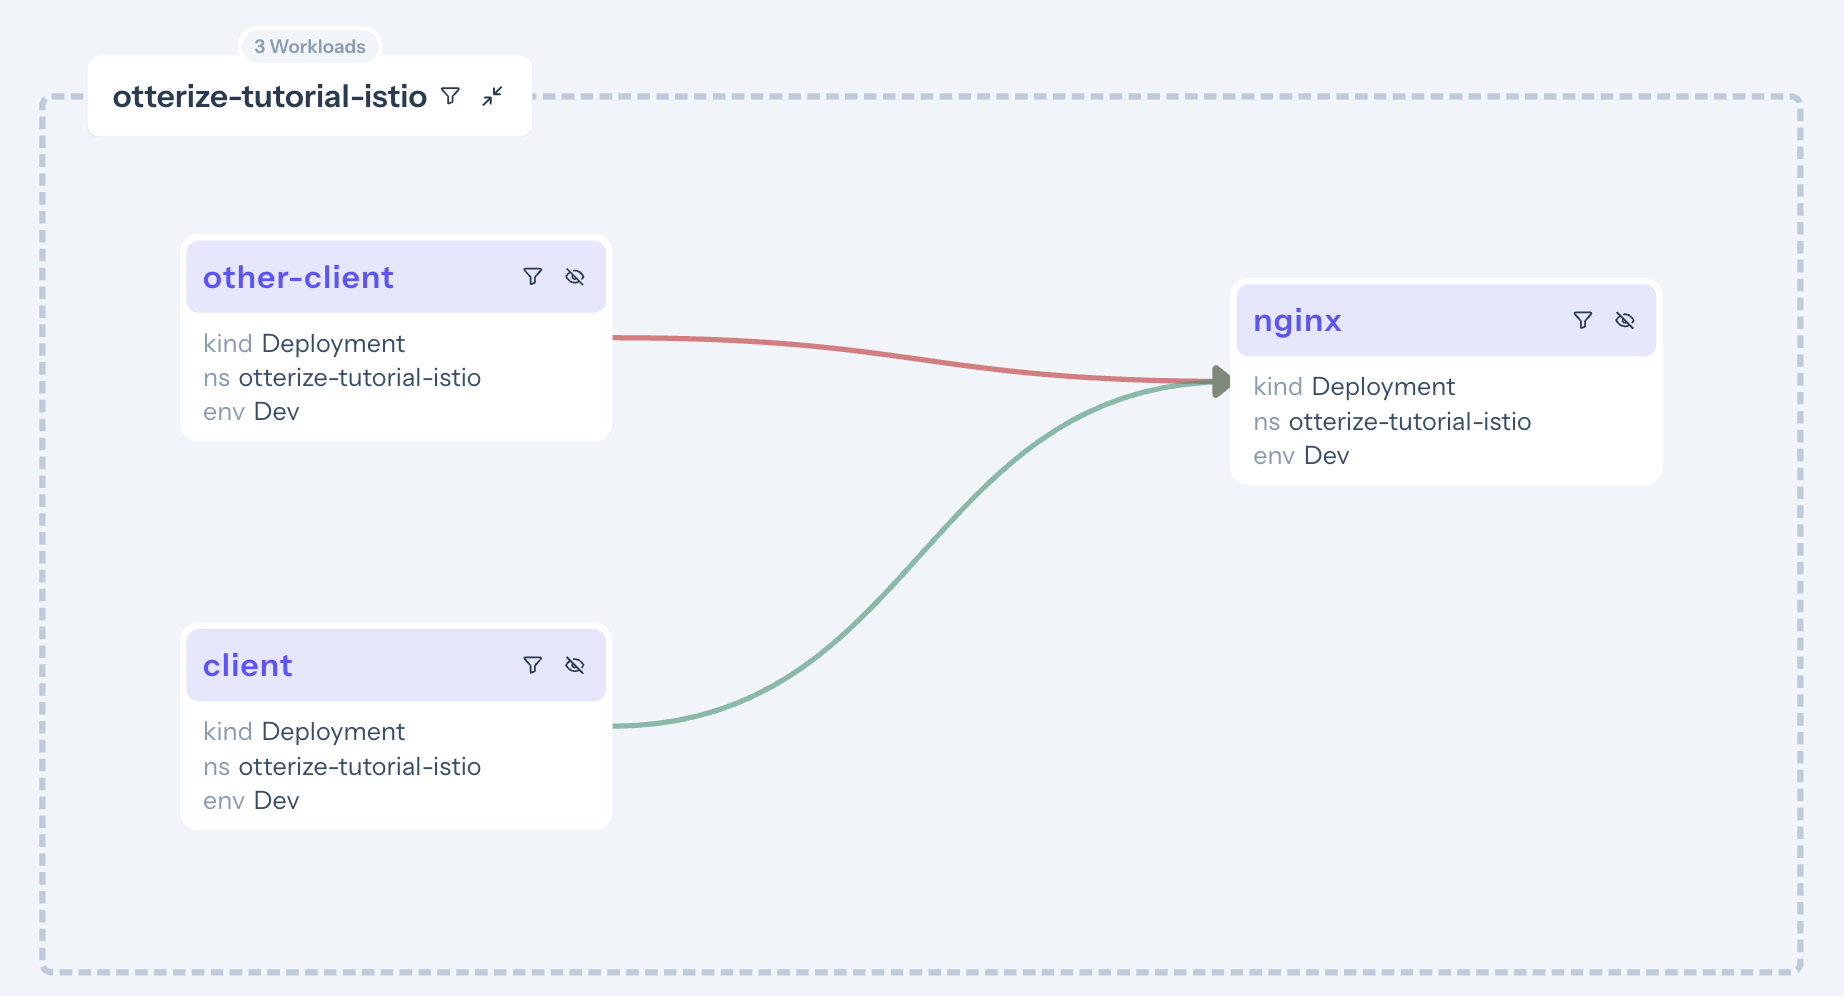
And upon clicking the green arrow:
It's now clear what happened:
- The server is now protected, and is also blocking some of its clients.
- Calls from [client] → [nginx] are declared and therefore allowed (green arrow).
- Calls from [client-other] → [nginx] are not declared and therefore blocked (red arrow). Click on the arrow to see what to do about it.
Otterize did its job of both protecting the server and allowing intended access.
What did we accomplish?
Controlling access through Istio authorization policies no longer means touching authorization policies at all.
The server is now protected, and can be accessed only by clients which declared their intents, authenticated via mTLS connection with specific certificates.
Clients simply declare what they need to access with their intents files.
The next
kubectl applyensures that authorization policies automatically reflect the most recent intended pod-to-pod access.
Expand to see what happened behind the scenes
Otterize generated a specific Istio authorization policy on the ingress of the pod of the server, allowing the server to be accessed by the pod of the client, based on that client's declared intent. Otterize uses labels to define the authorization policy and associate it with a server in a namespace, and uses service accounts to identify clients, as Istio requires. This happens as follows:
- The server's pod is given a label
intents.otterize.com/serverwhose value uniquely represents that server. The Istio authorization policy stipulates that it applies to the ingress of server pods with this label. - The client's service account is looked up through its pod, and used in the policy.
The authorization policy stipulates that only services with this service account can access the server.
In the event that the service account is shared by multiple services, an Event is placed on the
ClientIntentto warn about this, which is also picked up as a warning in Otterize Cloud, if connected.
Otterize saved us from doing all this work: by simply declaring the client's intents in intents.yaml,
all the appropriate configuration was managed automatically behind the scenes.
Try to create an intents file yourself for client-other, and apply it to allow this other client to call the server.
What's next
- Get started with the Otterize network mapper for Istio to help you bootstrap intents files with HTTP resources for use in intent-based access control (IBAC).
Teardown
To remove Istio and the deployed examples run:
helm uninstall istio-base -n istio-system
kubectl delete namespace otterize-tutorial-istio