AWS EKS network policies with the VPC CNI
This tutorial will walk you through deploying an AWS EKS cluster with the AWS VPC CNI add-on, while enabling the new network policy support on EKS with Otterize.
Prerequisites
- An EKS cluster with the AWS VPC CNI add-on installed and with the new built-in network policy support enabled. See Installing the AWS VPC CNI add-on for more information, or follow the instructions below.
- The Otterize CLI.
- The AWS CLI.
- The kubectl command-line tool.
Tutorial
Step one: Create an AWS EKS cluster with the AWS VPC CNI plugin
Before you start, you'll need an AWS Kubernetes cluster. Having a cluster with a CNI that supports NetworkPolicies is required for this tutorial.
eksctl create cluster -f cluster-config.yaml
Run the following command to create your AWS cluster. Don't have eksctl? Install it now.
curl https://docs.otterize.com/code-examples/aws-eks-mini/cluster-config.yaml | eksctl create cluster -f -
Inspect eks-cluster.yaml contents
apiVersion: eksctl.io/v1alpha5
kind: ClusterConfig

metadata:
  name: np-ipv4-127
  region: us-west-2
  version: "1.27"

iam:
  withOIDC: true

vpc:
  clusterEndpoints:
    publicAccess: true
    privateAccess: true

addons:
  - name: vpc-cni
    version: 1.14.0
    attachPolicyARNs: #optional
      - arn:aws:iam::aws:policy/AmazonEKS_CNI_Policy
    configurationValues: |-
      enableNetworkPolicy: "true"
  - name: coredns
  - name: kube-proxy

managedNodeGroups:
  - name: small-on-demand
    amiFamily: AmazonLinux2
    instanceTypes: [ "t3.large" ]
    minSize: 0
    desiredCapacity: 2
    maxSize: 6
    privateNetworking: true
    disableIMDSv1: true
    volumeSize: 100
    volumeType: gp3
    volumeEncrypted: true
    tags:
      team: "eks"
Once your AWS EKS has finished deploying the control pane and node group, the next step is deploying Otterize as well as a couple of clients and a server to see how they are affected by network policies.
Step two: Install the Otterize agents
Install Otterize on your cluster
To deploy Otterize, head over to Otterize Cloud and create a Kubernetes cluster on the Integrations page, and follow the instructions.
Deploy a server and two clients
So that we have some pods to look at (and protect), you can install our simple clients and server demo app that will deploy a server and 2 clients.
kubectl apply -f https://docs.otterize.com/code-examples/automate-network-policies/all.yaml
Once you have that installed and running your Otterize access graph should look something like this:
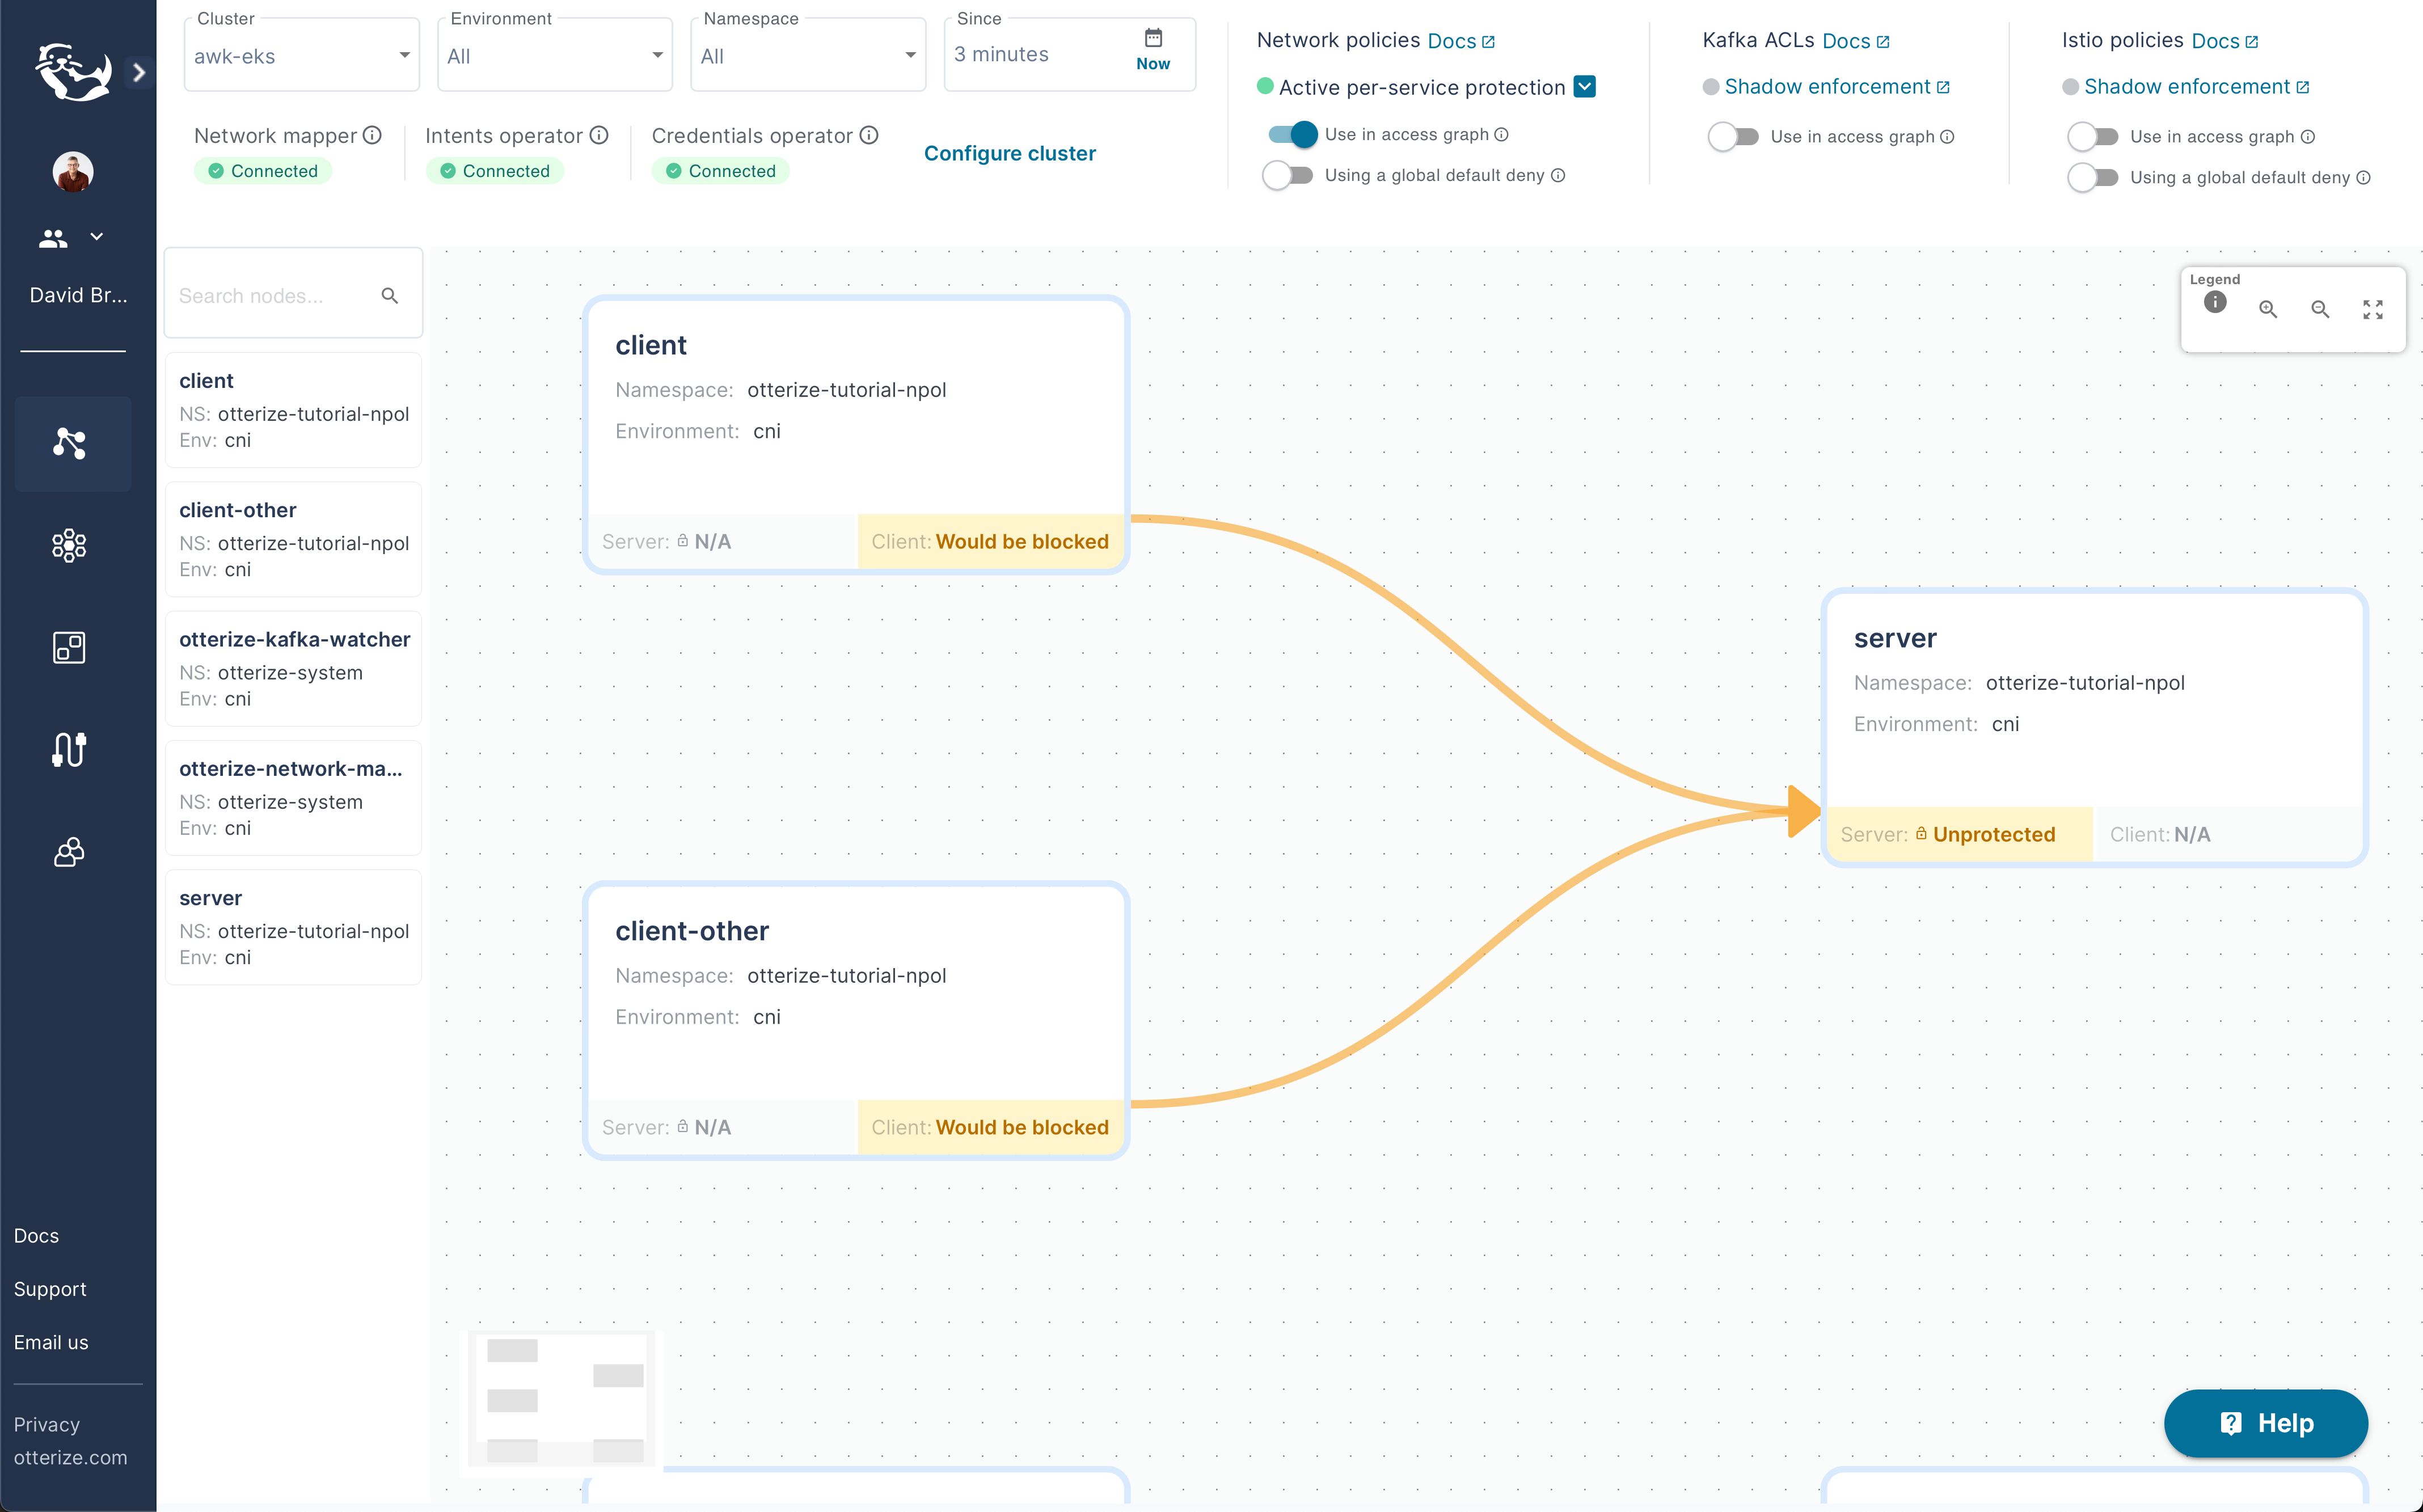
Step three: Create an intent
Now that you have Otterize installed, the next step is to create an intent which will enable access to the server from the client. If you enable protection on the server without declaring an intent, the client will be blocked.
You can click on the workloads or the lines connecting them to see which ClientIntents you need to apply to make the connection go green!
otterize network-mapper export --server server.otterize-tutorial-eks | kubectl apply -f -
Running this command will generate the following ClientIntents for each client connected to server and apply it to your cluster. You could also place it in a Helm chart or apply it some other way, instead of piping it directly to kubectl.
apiVersion: k8s.otterize.com/v2beta1
kind: ClientIntents
metadata:
name: client
namespace: otterize-tutorial-eks
spec:
workload:
name: client
kind: Deployment
targets:
- service:
name: server
---
apiVersion: k8s.otterize.com/v2beta1
kind: ClientIntents
metadata:
name: client-other
namespace: otterize-tutorial-eks
spec:
workload:
name: client-other
kind: Deployment
targets:
- service:
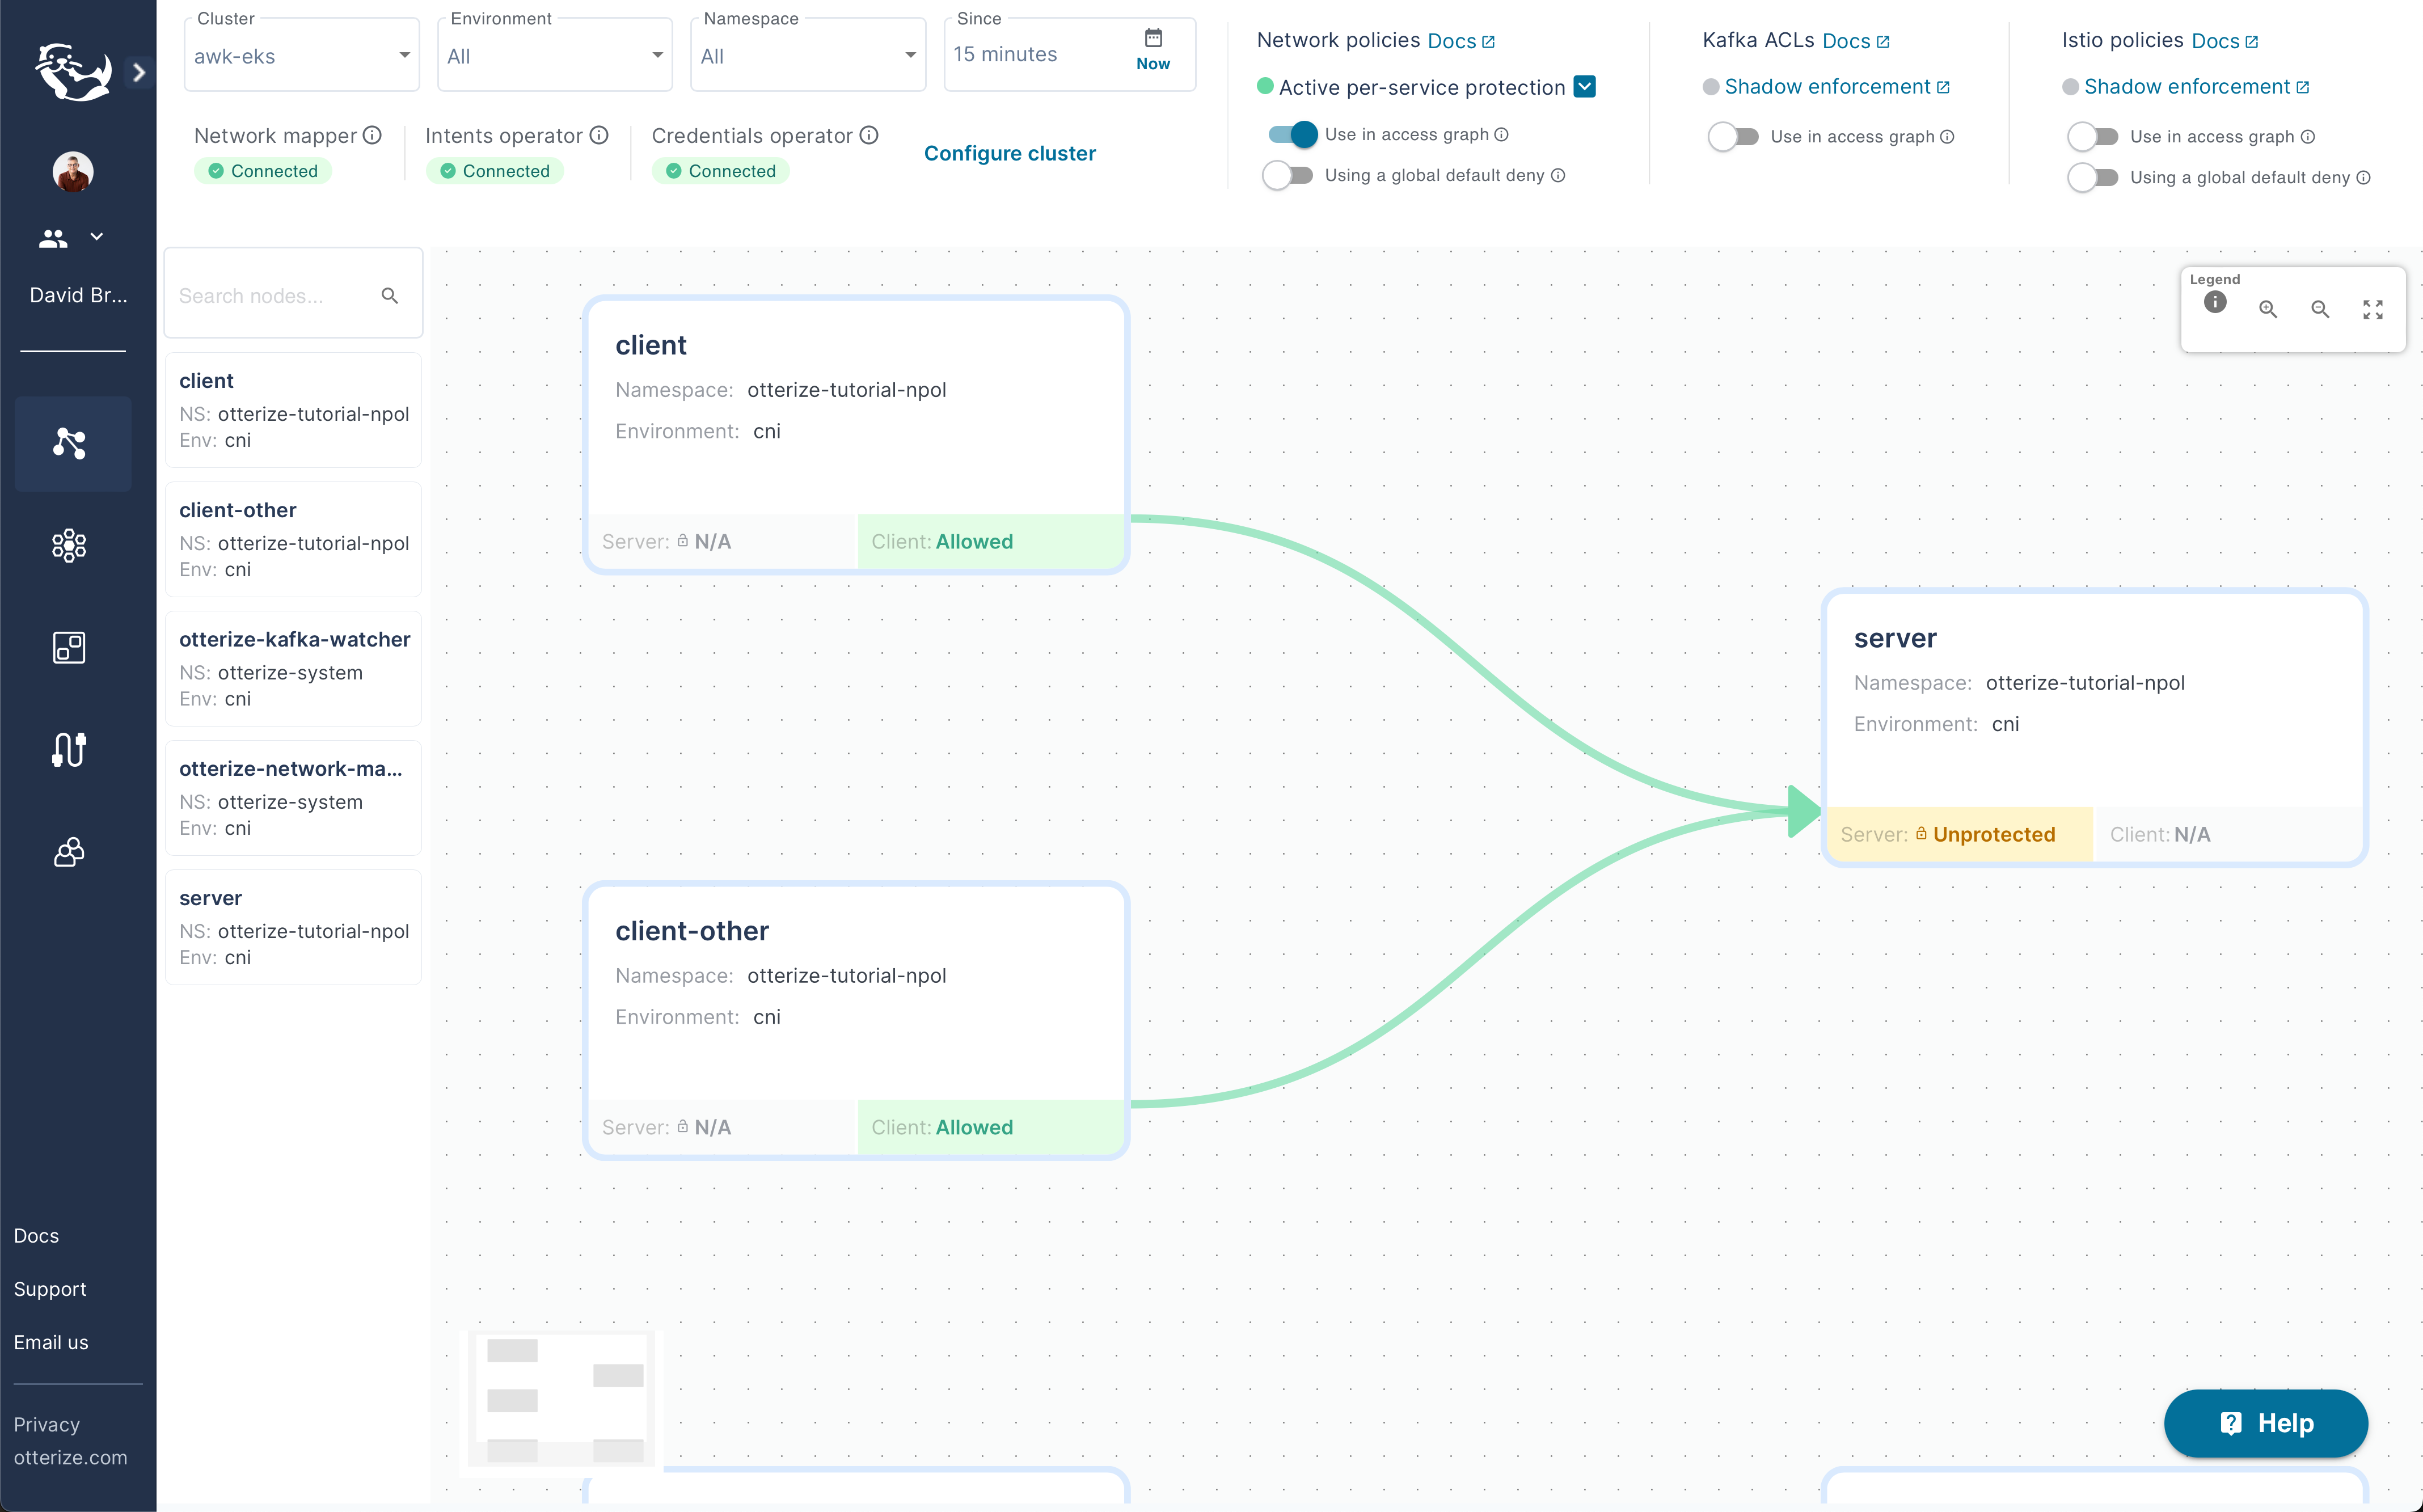
name: server
At which point you should see that the server workload is ready to be protected:
And you can then protect the server workload by applying the following yaml file:
apiVersion: k8s.otterize.com/v2beta1
kind: ProtectedService
metadata:
  name: server
  namespace: otterize-tutorial-eks

spec:
  name: server
  kind: Deployment
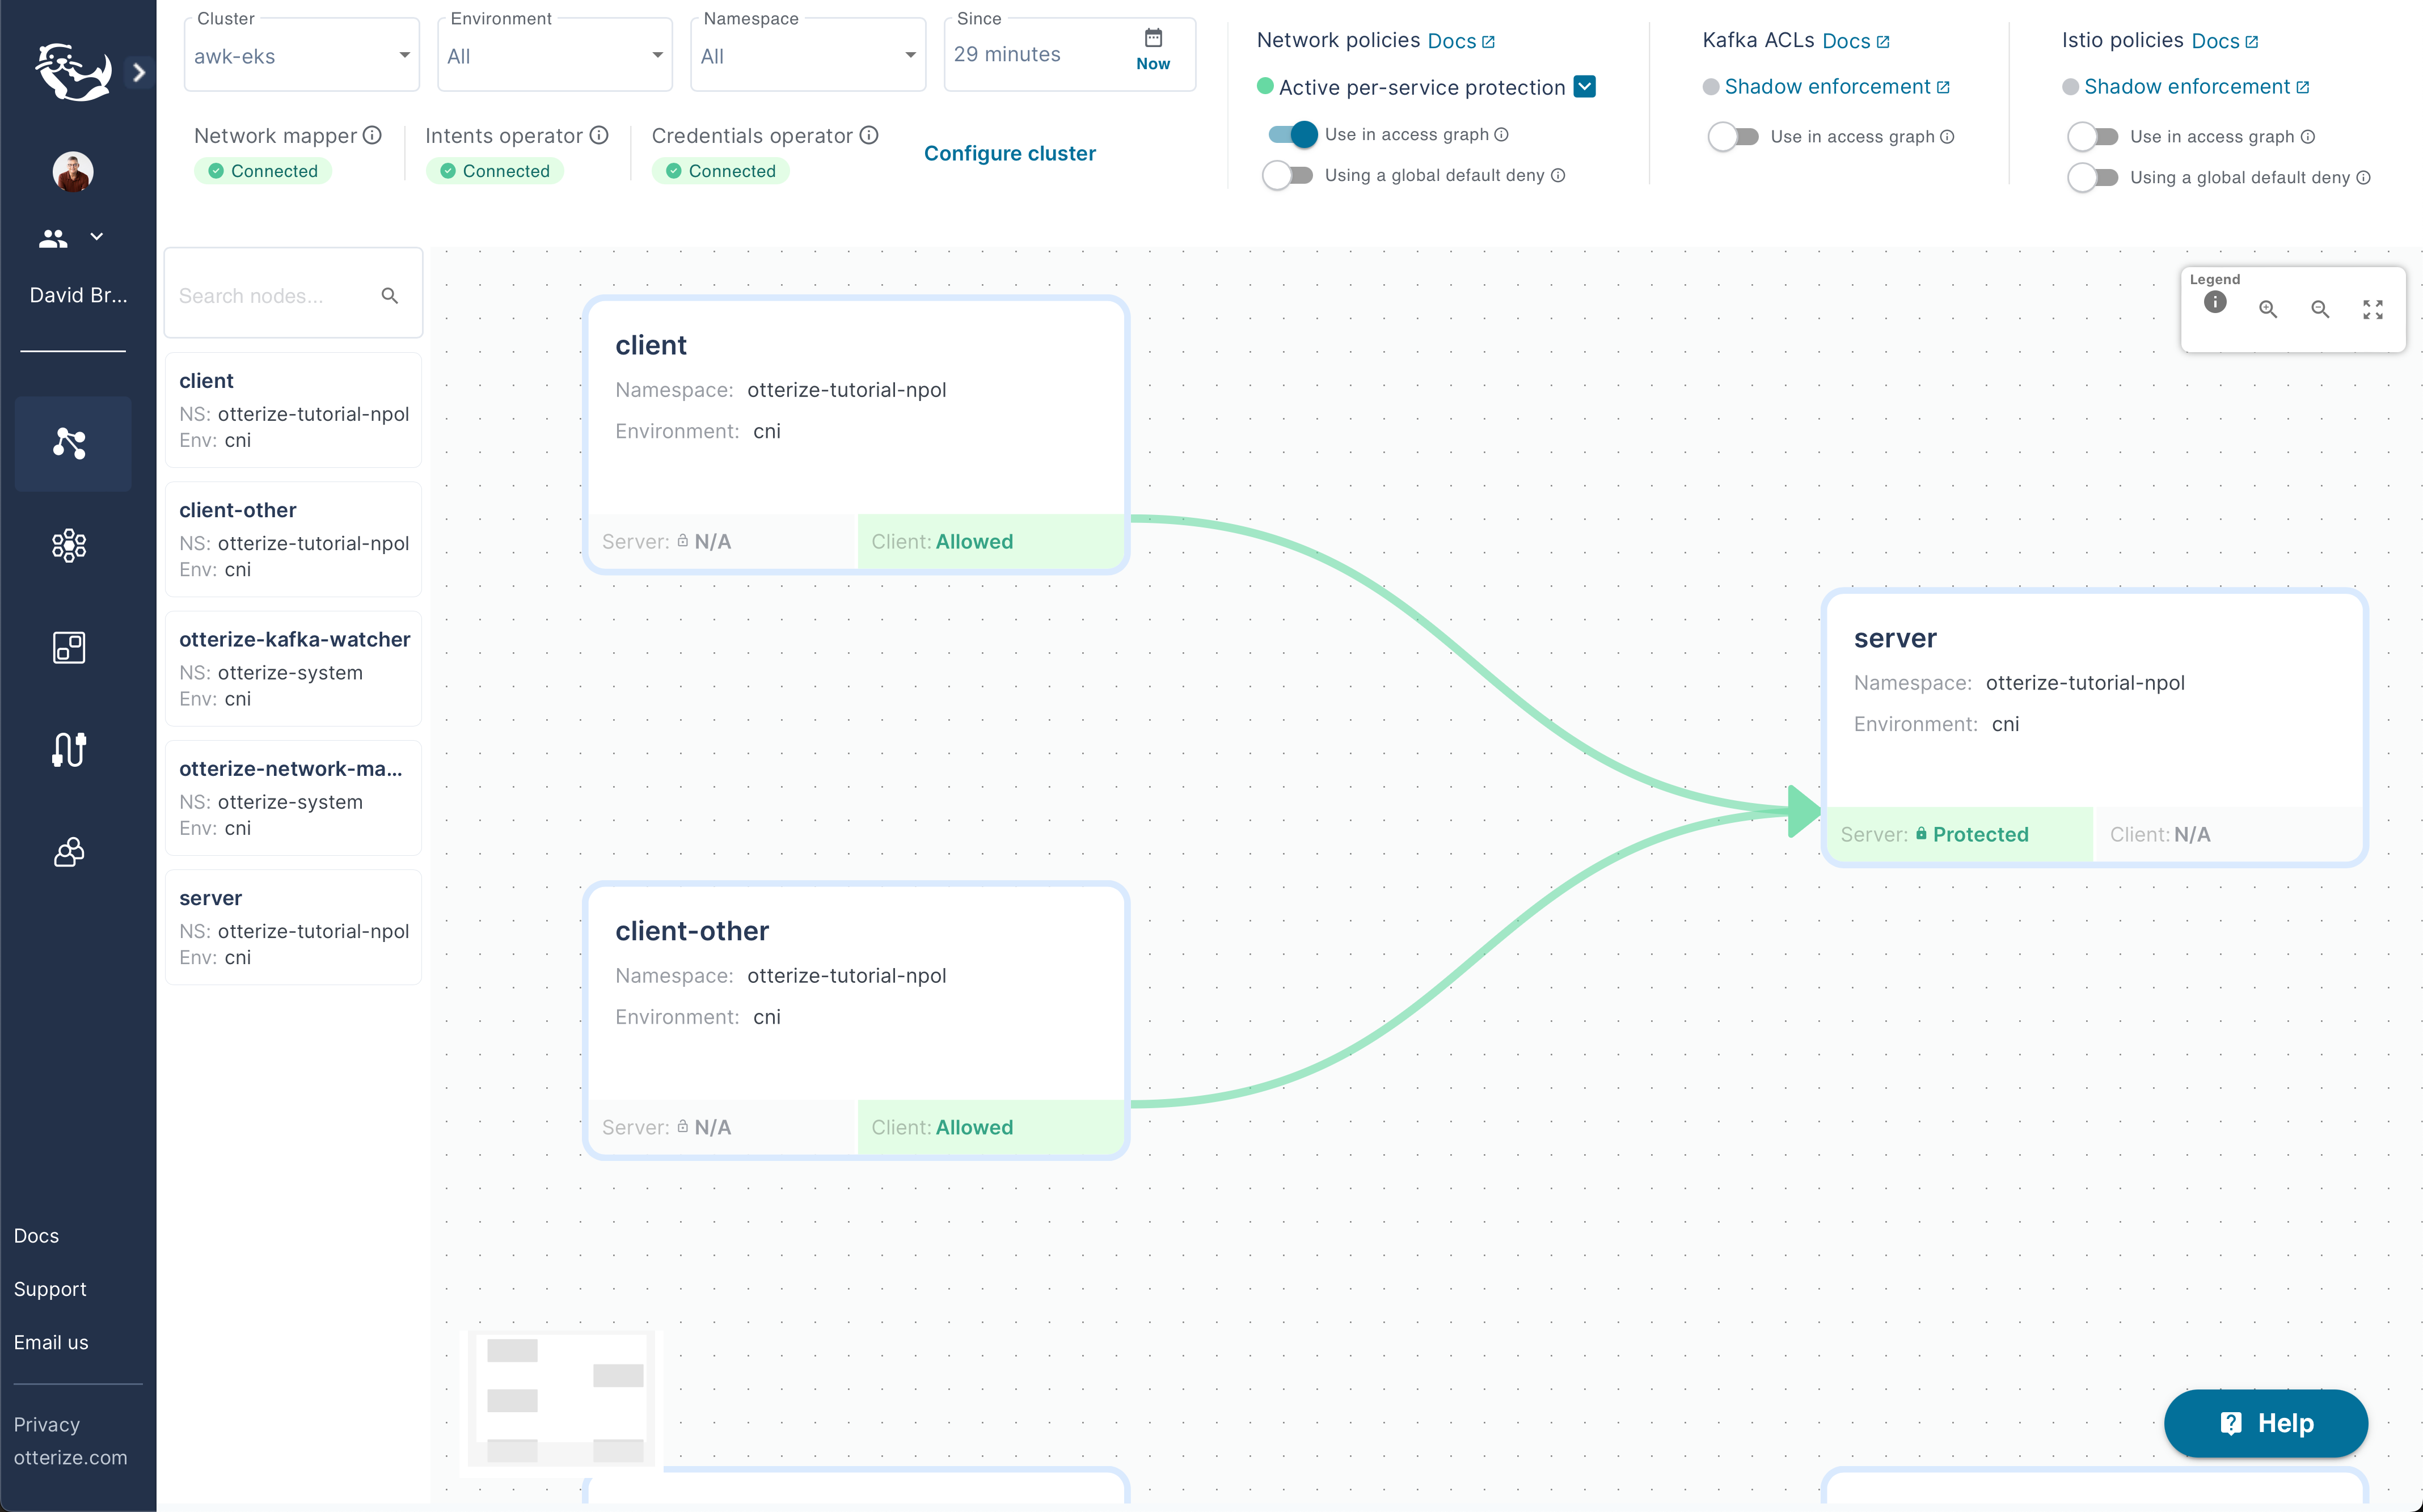
Protect the server by applying the resource:
kubectl apply -f https://docs.otterize.com/code-examples/aws-eks-mini/protect-server.yaml
And you should see your access graph showing the workload as protected:
What's next
Have a look at the guide on how to deploy protection to a larger, more complex application one step at a time.
Teardown
To remove the deployed examples run:
kubectl delete -f protect-server.yaml
otterize network-mapper export --server server.otterize-tutorial-eks | kubectl delete -f -
kubectl delete -f https://docs.otterize.com/code-examples/automate-network-policies/all.yaml
helm uninstall otterize -n otterize-system
eksctl delete cluster -f cluster-config.yaml