Protecting a service with network policies
Otterize enables intent-based access control (IBAC). In this guide, we'll roll out IBAC gradually, protecting just one service, and taking it all the way to production. We'll show how this can be done quickly, safely, and reproducibly:
- Choose one service to protect. Until you ensure its intended clients will have access, you'll run in "shadow mode": no network policies will actually be created against this server.
- Declare all its clients' intents to call it — which may be done automatically using the network mapper. See that it would now allow those clients if protection (using network policies) were turned on.
- Turn on protection for this one service: it is now secure against unintended access.
- Take it to production by understanding how this would also not break other production-relevant access such as ingress and policy management (e.g. Kyverno), and by putting this into your CI/CD process.
The goal is to show you how to realize zero trust, in production, in a matter of hours or days, even if it's just for one or a few services at first. It is that easy.
This guide uses the Google microservices demo (a simple e-commerce application), deployed to a Kubernetes cluster, for illustration.
Note: all the capabilities of IBAC are within Otterize OSS, while the access graph in Otterize Cloud will guide us visually at each step.
Prerequisites
Install Otterize on your cluster
If you do not have a cluster, we will need to prepare one with network policy support
To deploy Otterize, head over to Otterize Cloud and create a Kubernetes cluster on the Integrations page, and follow the instructions.
We will also need the Otterize CLI.
Tutorial
Deploy the demo set of services
To deploy these into your cluster:
kubectl create namespace otterize-ecom-demo
kubectl apply -n otterize-ecom-demo -f https://docs.otterize.com/code-examples/shadow-mode/ecom-demo.yaml
Optional: check that the demo was deployed.
To see all the pods in the demo:
kubectl get pods -n otterize-ecom-demo
The pods should all be ready and running:
    NAME                                     READY   STATUS    RESTARTS      AGE
    adservice-65494cbb9d-5lrv6               1/1     Running   0             115s
    cartservice-6d84fc45bb-hdtwn             1/1     Running   0             115s
    checkoutservice-5599486df-dvj9n          1/1     Running   3 (79s ago)   115s
    currencyservice-6d64686d74-lxb7x         1/1     Running   0             115s
    emailservice-7c6cbfbbd7-xjxlt            1/1     Running   0             115s
    frontend-f9448d7d4-6dmnr                 1/1     Running   0             115s
    kafka-0                                  1/1     Running   2 (83s ago)   115s
    loadgenerator-7f6987f59-bchgm            1/1     Running   0             114s
    orderservice-7ffdbf6df-wzzfd             1/1     Running   0             115s
    otterize-ecom-demo-zookeeper-0           1/1     Running   0             115s
    paymentservice-86855d78db-zjjfn          1/1     Running   0             115s
    productcatalogservice-5944c7f666-2rjc6   1/1     Running   0             115s
    recommendationservice-6c8d848498-zm2rm   1/1     Running   0             114s
    redis-cart-6b79c5b497-xpms2              1/1     Running   0             115s
    shippingservice-85694cb9bd-v54xp         1/1     Running   0             114s
You can now browse the web app of this demo, if you wish:
- K8s
- Minikube
To get the externally-accessible URL where your demo front end is available, run:
kubectl get service -n otterize-ecom-demo frontend-external | awk '{print $4}'
The result should be similar to (if running on AWS EKS):
a11843075fd254f8099a986467098647-1889474685.us-east-1.elb.amazonaws.com
Go ahead and browse to the URL above to "shop" and get a feel for the demo's behavior. (The URL might take some time to populate across DNS servers. Note that we are accessing an HTTP and not an HTTPS website.)
To get the externally-accessible URL where your demo front end is available, run:
kubectl port-forward -n otterize-ecom-demo service/frontend-external 8080:80 &
The demo is now accessible at:
http://localhost:8080
Go ahead and browse to the URL above to "shop" and get a feel for the demo's behavior.
Seeing the access graph
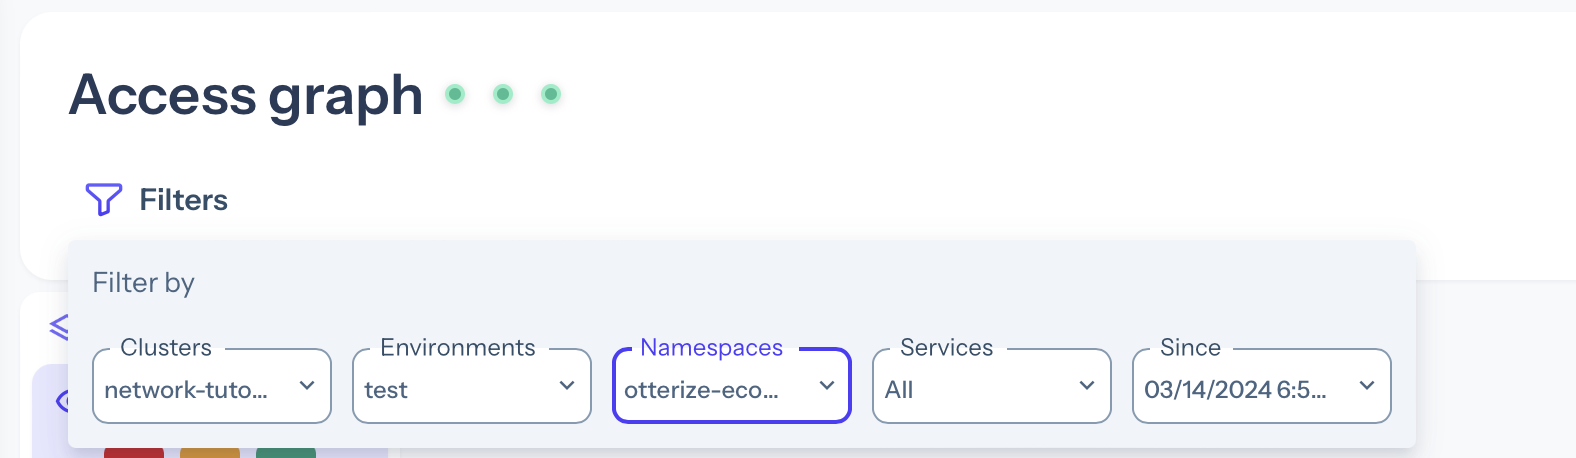
In the Otterize Cloud UI, your access graph should show 3 green statuses indicating that Otterize OSS operators — the network mapper, intents operator, and credentials operator — as connected.
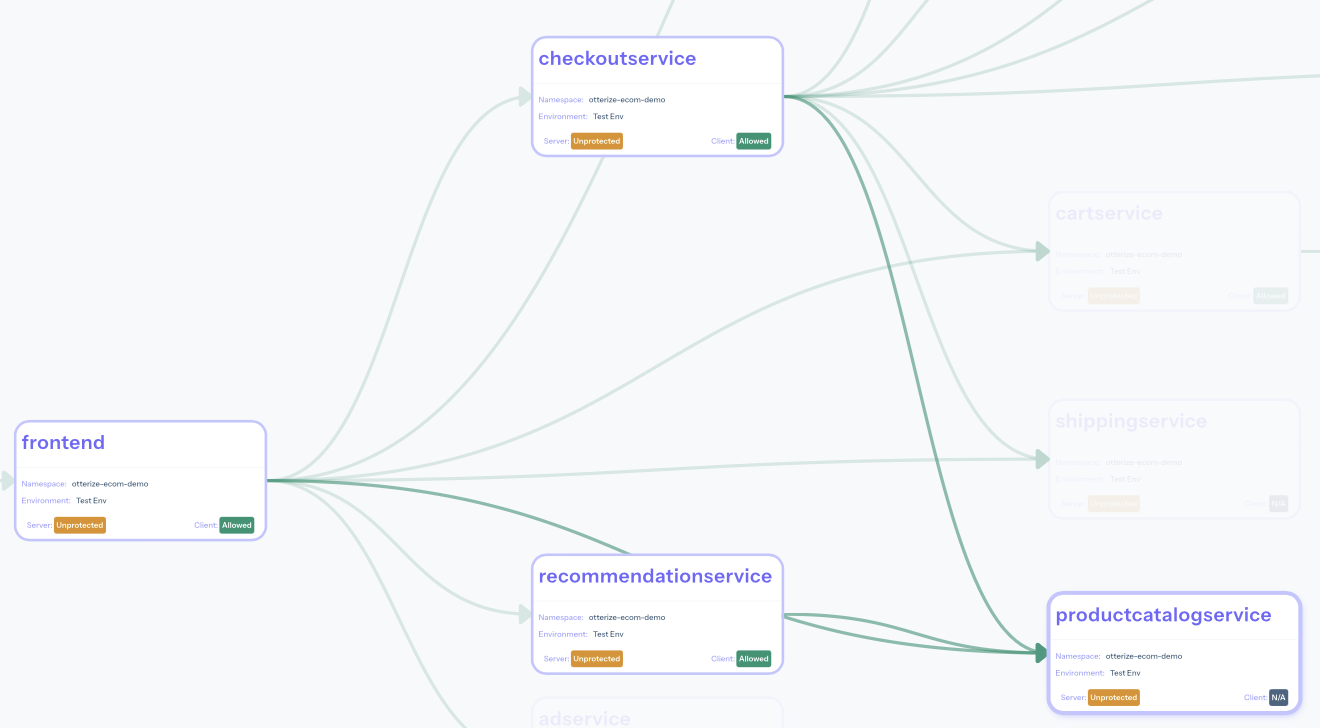
Below you should see the following map for the demo running in your cluster:
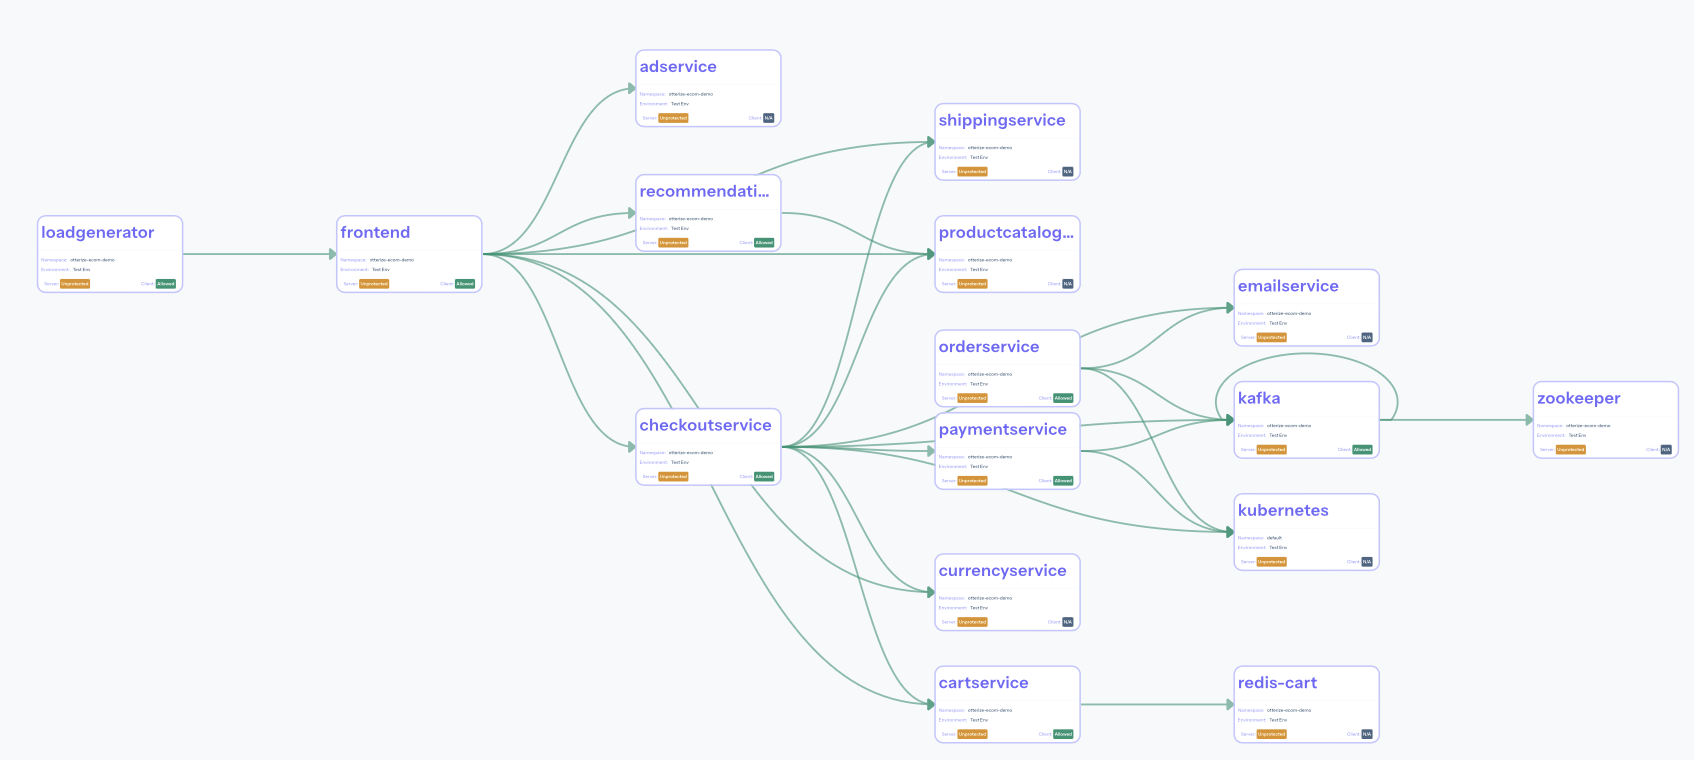
The graph shows services (nodes) connected by arrows (edges) indicating that one service (acting as a client) called another service (acting as a server). The arrows may be due to calls discovered by the network mapper, or to declared client intents YAMLs, or both.
In fact the graph shows a lot of interesting insights, such as:
- For each service you can see its namespace and environment. You can also see its state as a server and as a client, if applicable.
- As a server, you'll see whether it's protected against unauthorized access:
- unprotected;
- protected.
- As a client, you'll see whether it's allowed to call its servers:
- would be blocked from making some of its calls if the corresponding servers were protected;
- allowed to make all its calls even when all its servers are protected; or
- blocked now from making some of its calls.
- As a server, you'll see whether it's protected against unauthorized access:
- An arrow (→) indicates an intent by a client to call a server. It's derived from any discovered intent — a call discovered by the network mapper — and any explicitly declared intent that the client declared in its
ClientIntentsYAML.- Its color indicates the blocking status of calls from that client to that server:
- would be blocked if the server were protected;
- allowed even when the server is protected; or
- blocked right now.
- N/A when no server is being called.
- Its color indicates the blocking status of calls from that client to that server:
For our demo, the servers statuses are all yellow because the servers aren't (yet) protected, and because we haven't declared any intents so calls would be blocked if the servers were protected.
Choose one service to protect
Now let's prepare to protect just one service, but remain in shadow mode: no actual network policies, yet. We'll verify no intended access would be blocked before turning on the network policy protection.
Which service should you protect? That's up to you: maybe you have a particularly sensitive one that's higher priority; maybe you'd rather start with a less important one, until you feel confident.
In our case, we'll choose the productcatalogservice.
Zoom the access graph a bit to enlarge it around the productcatalogservice:
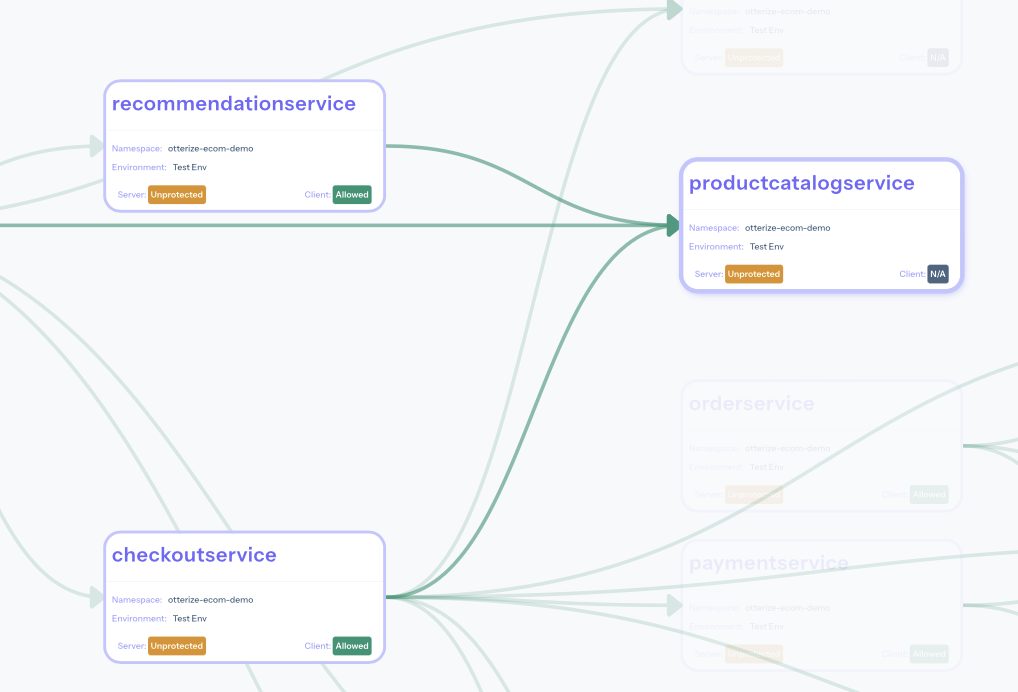
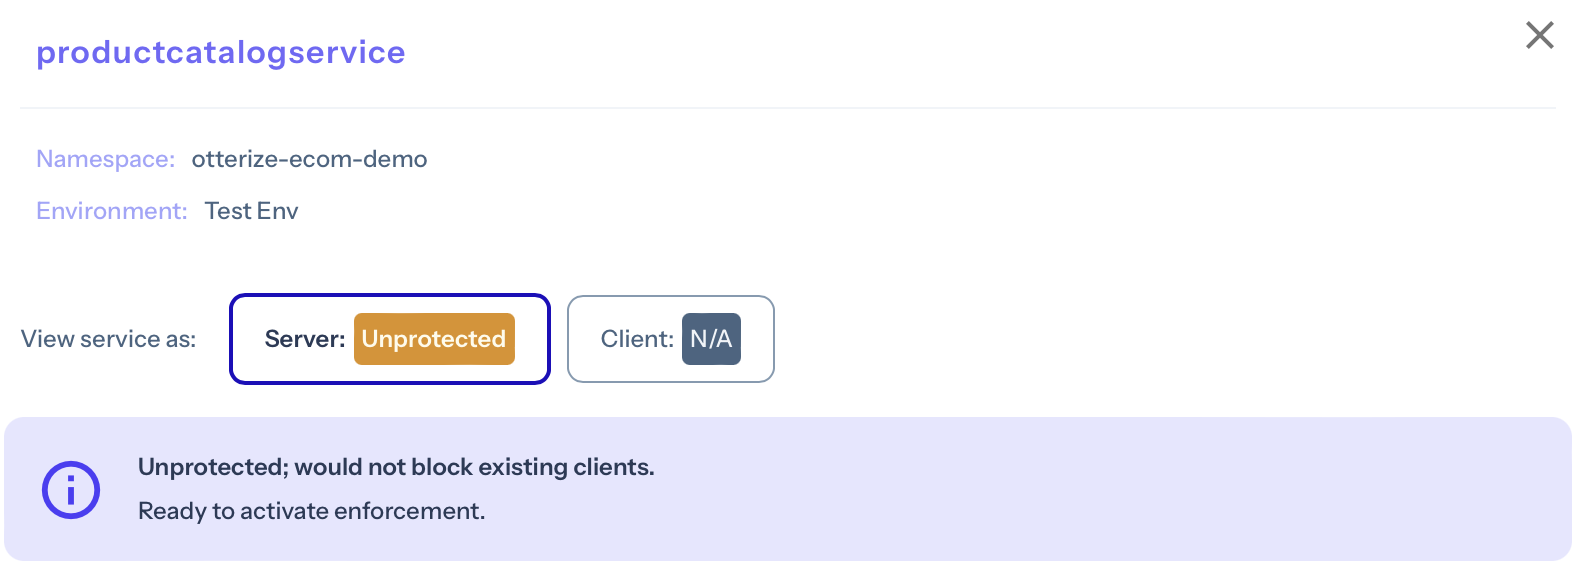
Click on the productcatalogservice to show more details about it:
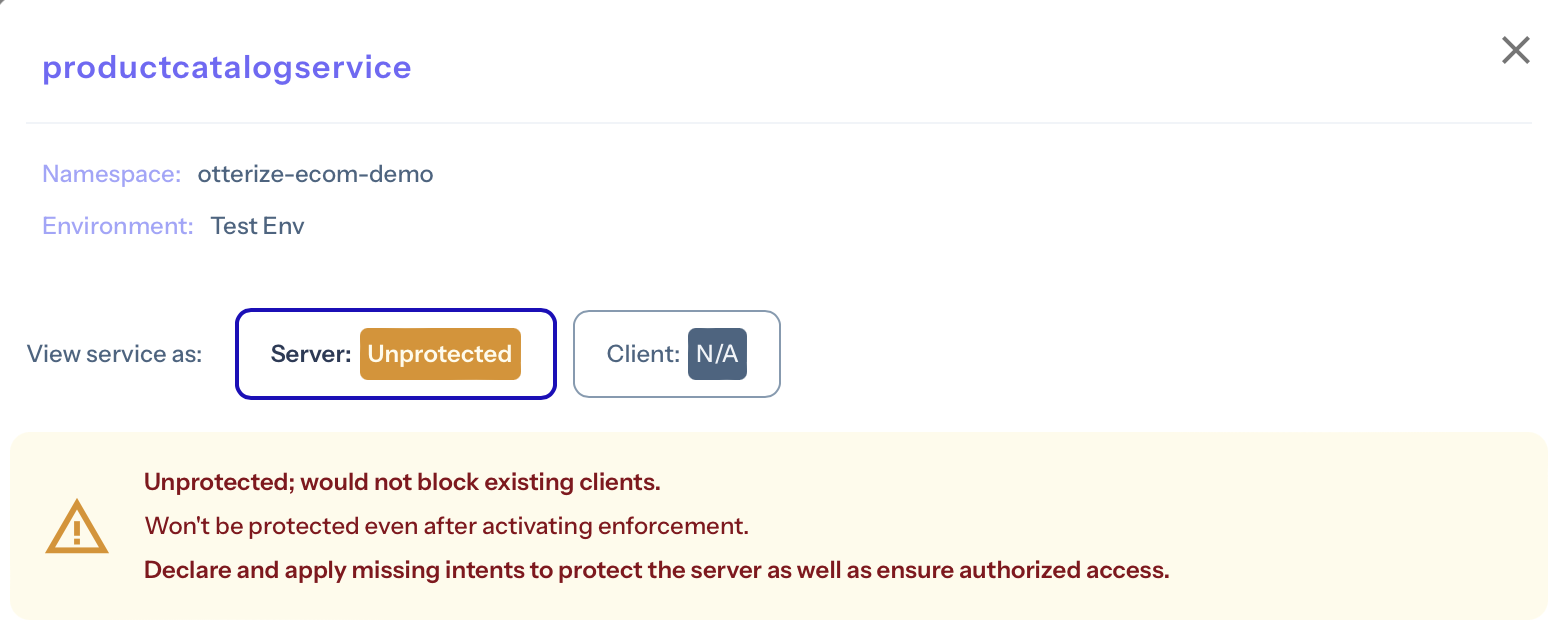
We can see that:
- As a server, it's currently unprotected (specifically, by network policies); that's expected, as we haven't yet turned on protection.
- It would block its clients if it were protected (because there would be no network policies allowing their access).
- To authorize its clients' access, we're told to declare their intents (which would generate those network policies — this is what IBAC means, after all).
Go ahead and close the productcatalogservice details. It's time to declare its clients' intents.
Declare client intents
The graph visually tells us we'll need to declare all 3 of those clients' intents:
frontend→productcatalogservice.recommendationservice→productcatalogservice.checkoutservice→productcatalogservice.
But you don't actually have to look at the graph, nor know in advance the way the demo app is supposed to work. You can auto-generate the intents.
It's likely you'll want the client devs who own the frontend, recommendationservice, and checkoutservice to eventually own those intent declarations, evolve them with their client code as their clients' needs change, review and approve them when they do, etc. They can then serve themselves, and make sure they can access the servers they need, while those servers remain protected.
But if you're just getting started with IBAC, and want to first see it in production before getting client devs involved, you can just auto-generate the needed client intents. In fact, you don't need to know in advance which clients call the server: the network mapper will tell you all you need. Just make sure there is representative traffic (load) in your cluster so that the network mapper will see all the expected call patterns.
Let's ask the network mapper to export all the client intents it discovered for the clients of productcatalogservice:
otterize network-mapper export --server productcatalogservice.otterize-ecom-demo
Here's the output:
apiVersion: k8s.otterize.com/v2beta1
kind: ClientIntents
metadata:
  name: checkoutservice
  namespace: otterize-ecom-demo
spec:
  workload:
    name: checkoutservice
    kind: Deployment
  targets:
    - service:
        name: cartservice
    - service:
        name: currencyservice
    - service:
        name: emailservice
    - service:
        name: kafka
    - service:
        name: paymentservice
    - service:
        name: productcatalogservice
    - service:
        name: shippingservice
---
apiVersion: k8s.otterize.com/v2beta1
kind: ClientIntents
metadata:
  name: frontend
  namespace: otterize-ecom-demo
spec:
  workload:
    name: frontend
    kind: Deployment
  targets:
    - service:
        name: adservice
    - service:
        name: cartservice
    - service:
        name: checkoutservice
    - service:
        name: currencyservice
    - service:
        name: productcatalogservice
    - service:
        name: recommendationservice
    - service:
        name: shippingservice
---
apiVersion: k8s.otterize.com/v2beta1
kind: ClientIntents
metadata:
  name: recommendationservice
  namespace: otterize-ecom-demo
spec:
  workload:
    name: recommendationservice
  targets:
    - service:
        name: productcatalogservice
These are indeed the 3 clients of the productcatalogservice.
The network mapper detected that these clients will call many servers besides the productcatalogservice, as you would expect by looking at the access graph.
Even though we're only looking to protect the productcatalogservice now, it's best to declare all of those calls from those 3 clients: those intents reflect the actual intent of the code, declaring them won't interfere with anything, and it will get us ready to protect those other servers too, in the future.
Let's apply these client intents:
otterize network-mapper export --server productcatalogservice.otterize-ecom-demo \
| kubectl apply -f -
If we now look at the access graph, lo and behold: the lines and arrows from all 3 clients to productcatalogservice are now green: all the necessary intents have been declared. (And a lot of other lines are now green too, since these clients also call many other servers; these other servers may soon be ready to protect too.)
You can look into at any of the calls to the productcatalogservice and see they would not be blocked if this server were protected, e.g.:
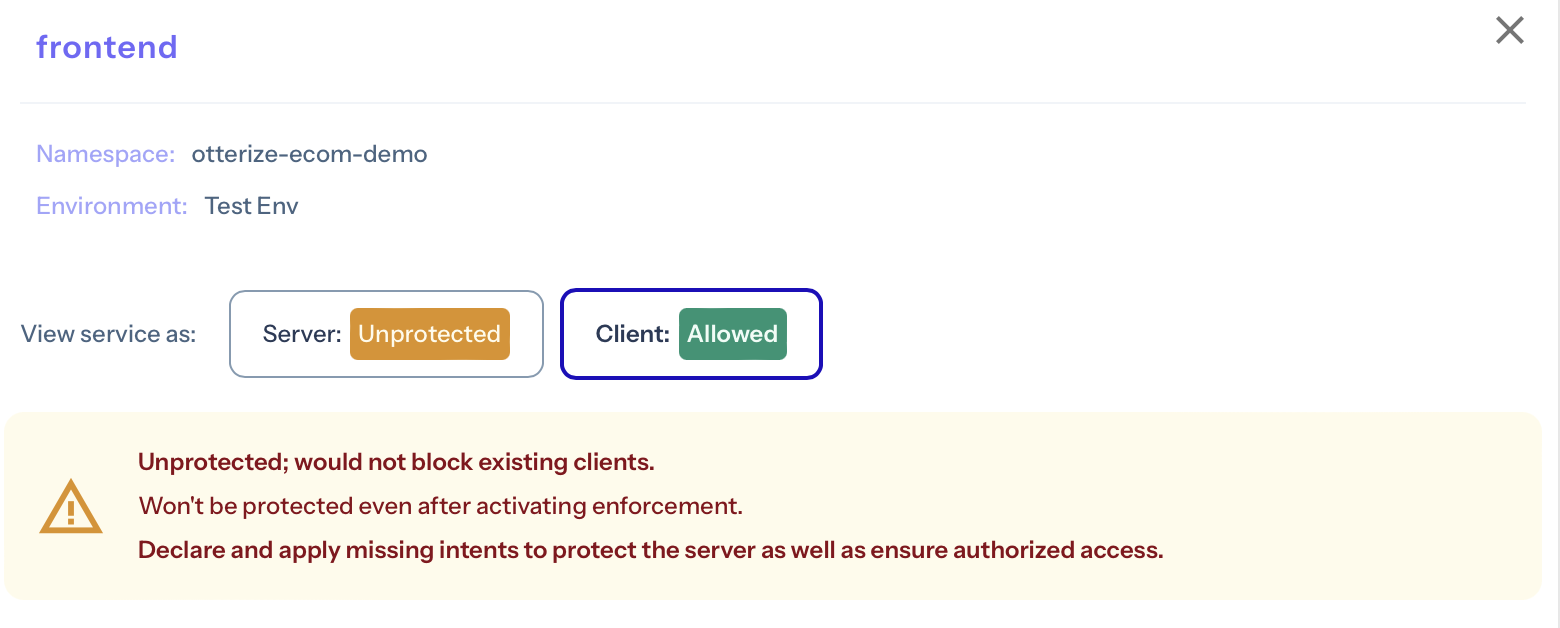
And you can verify the productcatalogservice would not block any of its discovered clients by clicking on it:
The server is still yellow because it's unprotected — let's fix that.
Protect the productcatalogservice
Now that we've verified no intended clients would be blocked, we can safely protect the server.
To do so, recall that we configured Otterize OSS to be in the defaultShadow mode: by default, it's in shadow mode for all services, not actually managing network policies for them. To protect a service is a simple matter of applying a ProtectedService YAML for it, overriding the default for it:
apiVersion: k8s.otterize.com/v2beta1
kind: ProtectedService
metadata:
  name: productcatalogservice
  namespace: otterize-ecom-demo
spec:
  name: productcatalogservice
  kind: Service
Let's apply this file to our cluster:
kubectl apply -n otterize-ecom-demo -f https://docs.otterize.com/code-examples/guides/protect-1-service-network-policies/protect-productcatalogservice.yaml
This has two effects:
- Applies a default-deny ingress network policy to the
productcatalogserviceto protect it against unauthorized (undeclared) access. - Creates and manages network policies (including managing labels on client pods, this namespace, and this server pod) for all declared access. In other words, it enforces network policies only for this
productcatalogserviceserver.
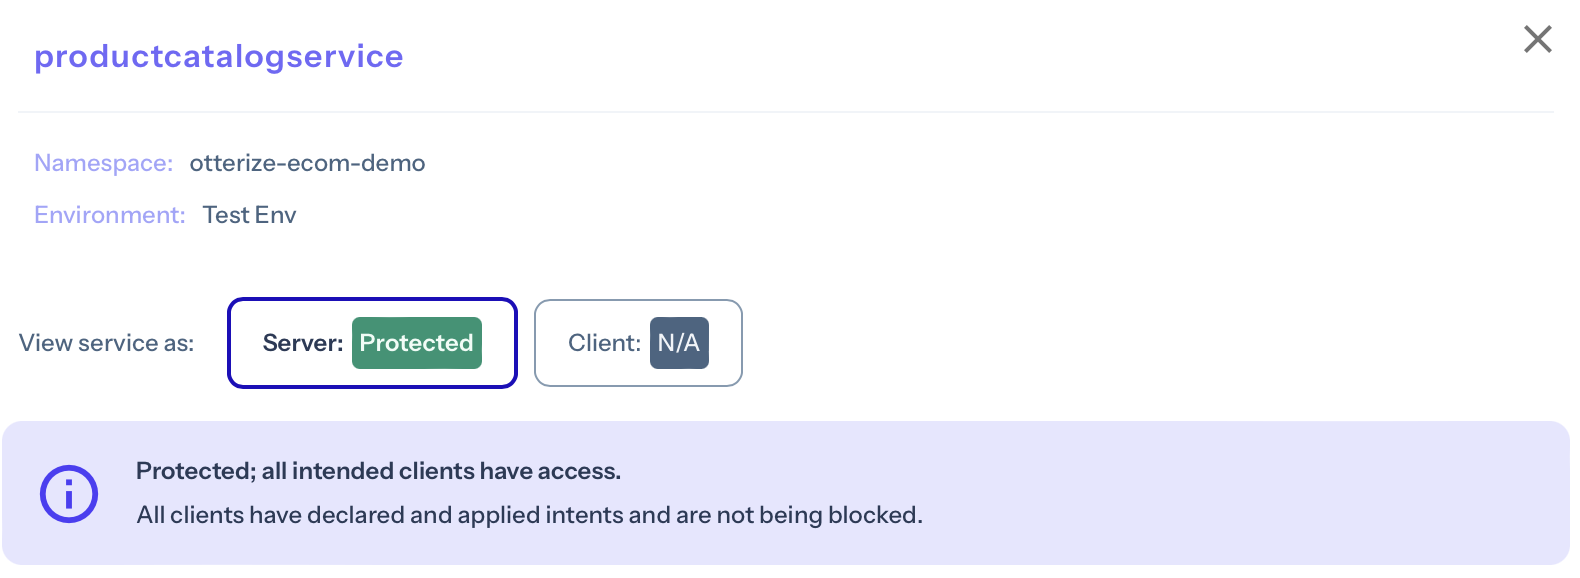
Let's look again at the access graph to see what happened in the cluster:
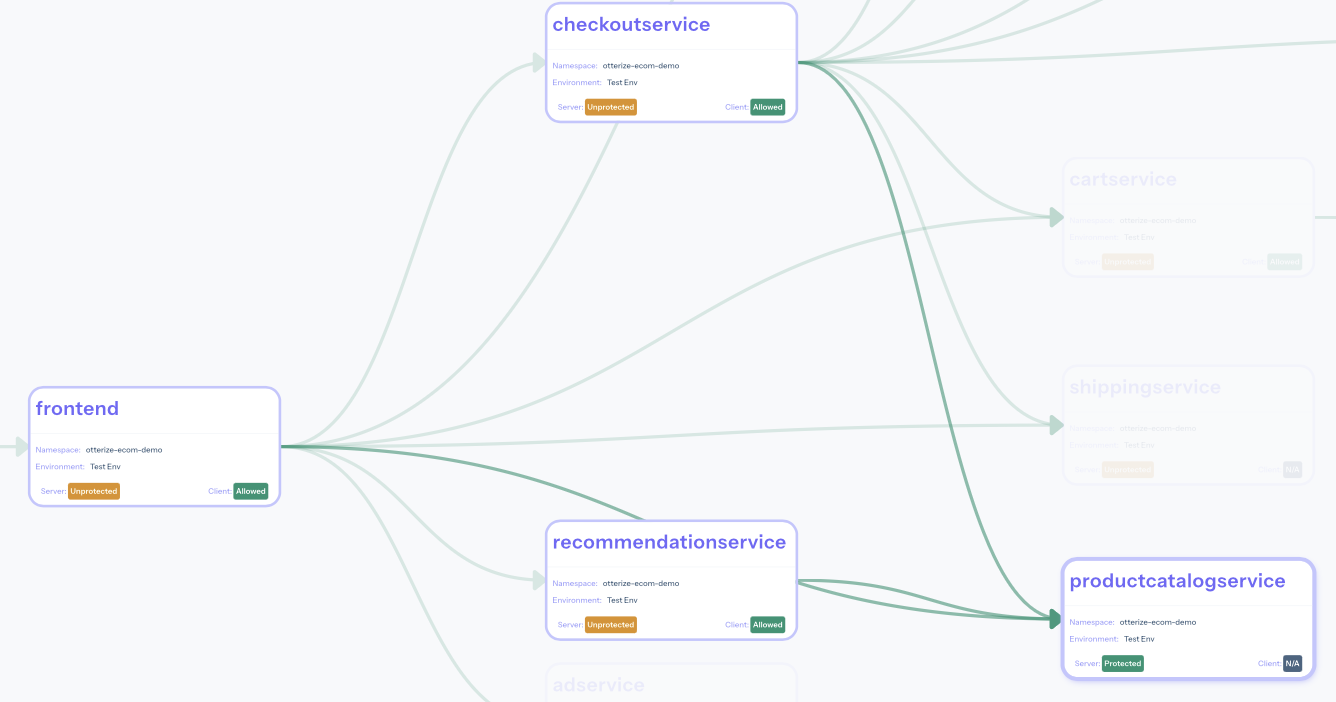
Sure enough, the productcatalogservice is green: it's protected against unauthorized access, and allowing authorized clients. Clicking on it confirms this:
Ready for production
Will load balancers, ingress, and other external traffic be affected?
The intents operator automatically detects resources of kind Service (with type LoadBalancer or NodePort), or of kind Ingress, and creates network policies to allow external traffic to relevant pods.
You do not need to configure anything to get this to work. Learn more here.
Will admission webhook controllers, e.g. policy validators like Kyverno, be affected?
Since you are not placing a global default-deny policy that would affect controllers in your cluster, only default-deny network policies on individual pods, Otterize will not affect calls to admission webhook controllers and they will continue functioning as before.
Working with Otterize in CI/CD
We recommend placing the ClientIntents and ProtectedService resource YAMLs alongside the services that own them, in their respective Git repositories:
- The
ProtectedServiceYAMLs alongside the servers they are protecting, e.g. in the Helm chart belonging to the server. ClientIntentsYAMLs, whether they were generated from the network mapper or created and maintained by the client developer teams, alongside each client, e.g. in the Helm chart belonging to the client.
In summary
So what have we learned? You can gradually roll out IBAC and drive towards zero trust, service by service, in a safe, predictable, and quick way, by following 4 simple steps:
- Choose a service to protect, say
<NAME>.<NAMESPACE>. - Export its client's intents:
otterize network-mapper export --server <NAME>.<NAMESPACE> > protect-<NAME>.yaml. - Declare those intents:
kubectl apply -f protect-<NAME>.yaml. - Now protect that server by
kubectl apply -fwith the following YAML:
apiVersion: k8s.otterize.com/v2beta1
kind: ProtectedService
metadata:
  name: <NAME>
  namespace: <NAMESPACE>
spec:
  name: <NAME>
  kind: <KIND>
Lather, rinse repeat, protecting service after service as you grow more comfortable, with the access graph providing visibility at each step of the way.
Teardown
To remove the deployed demo run:
kubectl delete -n otterize-ecom-demo -f https://docs.otterize.com/code-examples/shadow-mode/all.yaml
kubectl delete -n otterize-ecom-demo -f https://docs.otterize.com/code-examples/shadow-mode/ecom-demo.yaml
kubectl delete namespace otterize-ecom-demo